


Marketing teams rarely suffer from a complete lack of content. The more common problem is that much of what they already have does not appear ready for the next campaign.
An older product shoot may exist only as standard-resolution exports. A promising video draft may contain a temporary watermark or obsolete logo. A strong photograph may be too small for a large display, an aggressive crop, or a high-density screen. Faced with these limitations, teams often commission new creative before determining whether existing assets can be repaired and reused.
That approach can be expensive. A reshoot involves planning, talent, locations, equipment, approvals, and post-production. It also takes time before the first usable asset enters the publishing workflow. Repurposing does not eliminate the need for new production, but it can reduce unnecessary work by extracting more value from media the organization already owns.
AI-assisted watermark removal, cleanup, and photo upscaling make that strategy more practical. The goal is not to make every file 8K or to disguise a weak source. It is to create clean, flexible masters that can support modern layouts and multiple channels without compromising product accuracy or brand trust.
Why Repurposing Has Become a Production Priority
One campaign concept now needs to appear in more places than ever. A single visual idea may be adapted for a website hero, ecommerce listing, social feed, vertical story, email, digital presentation, retail screen, and event display. Each destination has different dimensions, crops, viewing distances, and file constraints.
Producing a separate shoot for every variation is rarely efficient. Even when new photography is required, teams benefit from combining it with a well-managed archive. Existing footage may contain additional angles, demonstrations, testimonials, background scenes, or seasonal moments that remain relevant after the original campaign ends.
Repurposing turns that archive into an active production resource. Instead of asking whether an old file is perfect, teams ask whether it contains enough useful visual information to become a new approved asset.
AI expands the range of files that can pass that test. It can help clear authorized overlays, reconstruct simple backgrounds, reduce visible artifacts, and create larger still-image masters. Human editors can then spend more time on creative adaptation and less time on repetitive repair.
The Business Case: Value per Source Asset
The return on content is often discussed at the campaign level, but repurposing is easier to evaluate at the asset level. One source photograph that produces five effective channel variants delivers more production value than a file used once and forgotten.
This does not mean maximizing the number of exports. It means increasing the number of useful, approved applications without creating unnecessary production cost.
A simple asset-level calculation can include:
- The estimated cost of creating or licensing the original
- The labor required to clean and adapt it
- The number of approved channel variants produced
- The cost of an equivalent reshoot or manual reconstruction
- The time saved before publication
- The performance of the repurposed creative
- The additional period during which the asset remains usable
This framework keeps AI enhancement connected to business outcomes. A technically impressive upscale has little value if it never enters a campaign. A modest repair can have strong value if it prevents a reshoot and produces several high-performing variations.
Step 1: Audit the Existing Visual Library
Start with inventory rather than editing. Gather original camera files, design exports, licensed media, published versions, and old campaign folders. The highest-quality source may be stored somewhere other than the current content management system.
For each candidate, record:
- Ownership and modification rights
- Original dimensions and format
- Compression history, if known
- Existing logos, watermarks, captions, or timestamps
- Visible blur, noise, pixelation, and artifacts
- Product or brand details that must remain accurate
- Potential placements and required aspect ratios
- Whether a better source or clean master may still exist
Classify the files as ready, repairable, specialist review, or replace. A clean but undersized product image is often repairable. A small watermark over a plain background may be suitable for automated removal. A severely blurred subject or unreadable product label may require replacement.
This triage prevents teams from spending time on assets that cannot meet the intended standard. It also identifies quick wins that can prove the value of the workflow before a larger archive project begins.
Step 2: Match the Source to a New Purpose
Repurposing works best when the destination is defined before processing begins. The required quality for a mobile thumbnail is different from the standard for a trade-show screen or detailed product page.
Ask four questions:
- Where will the asset appear?
- At what dimensions and viewing distance will people see it?
- How much cropping or reframing will the layout require?
- Which visual details influence trust or purchasing decisions?
A source does not need to support every imaginable use. It needs to support the selected use honestly and effectively. A standard-resolution clip may work well in a compact social placement even if it cannot withstand a large projection. A photo that is too small for a wide banner may become a strong square product feature after upscaling and careful cropping.
Defining the destination also prevents waste. Teams can choose an appropriate enhancement level instead of producing oversized files without a publishing need.
Step 3: Remove Authorized Watermarks and Obsolete Graphics
Draft footage often carries review marks, temporary logos, usernames, or graphics from an earlier campaign. These elements can make a useful clip feel recycled and may conflict with current branding.
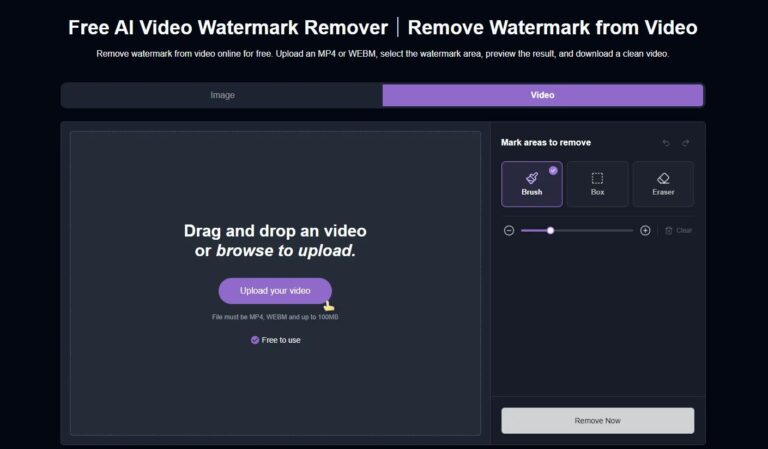
When the organization owns the material or has permission to modify it, an AI tool designed to remove watermark from video can help reconstruct the covered area across frames. This can reduce the manual effort required to prepare a clean base for new creative.
Use the Smallest Effective Selection
Mask only the area that needs repair. A larger selection asks the model to generate more content and increases the chance of visible inconsistencies.
Review Motion, Not Just Still Frames
A repaired area may look convincing in one frame but flicker or drift during playback. Watch the full clip at normal speed and inspect sections with cuts, camera movement, changing light, or objects passing behind the watermark.
Know When to Escalate
Automated removal is most reliable over simple, stable backgrounds. If a watermark covers a face, product label, hand, reflection, or complex moving pattern, use the original clean source or a specialist editor whenever possible.
Watermark removal must never be used to bypass ownership or licensing conditions. Removing a visible mark does not create the right to republish someone else’s content.
Step 4: Clean the Source Before Enlarging It
Upscaling affects the entire image. If dust, compression blocks, noise, or old graphic fragments remain, enlargement can make them more noticeable.
Perform basic cleanup first:
- Remove authorized overlays and unwanted objects.
- Correct obvious exposure and white-balance problems.
- Apply restrained denoising where needed.
- Reduce compression artifacts before sharpening.
- Repair minor background distractions.
- Confirm that no critical details were changed.
Avoid aggressive treatments. Heavy denoising can erase natural texture, while excessive sharpening can create halos around products and people. The objective is a stable, clean source for the upscaling stage, not a dramatically processed intermediate file.
Keep the untouched original and save cleanup as a separate working version. This makes comparisons possible and protects the archive from irreversible edits.
Step 5: Build a High-Resolution Working Master
Traditional resizing makes an image larger by interpolating between existing pixels. AI super-resolution uses learned visual patterns to estimate additional detail and produce more convincing contours and textures.
An 8k photo upscaler AI can help turn a standard-size photograph into a larger working master for high-resolution layouts, close crops, and multichannel adaptation. The important word is “working.” An 8K master does not mean every final asset should be delivered at 8K.
Choose Resolution According to the Workflow
Estimate the largest realistic placement and the tightest expected crop. Upscale enough to support those needs, plus a reasonable editing margin. Maximum output is unnecessary when the final image will appear as a small tile.
Treat Generated Detail as an Estimate
AI can infer plausible hair, fabric, foliage, and surface texture, but it cannot guarantee an exact reconstruction of missing information. Review logos, labels, buttons, seams, jewelry, eyes, teeth, and other small high-risk features.
Export Down From the Master
Keep one approved high-quality master. Create smaller delivery files for websites, marketplaces, email, and social platforms. This preserves future flexibility without forcing users to download unnecessarily large assets.
What 8K Can and Cannot Do for Marketing
8K is useful when it provides working room. Large event screens, premium displays, digital signage, zoomable product views, print-adjacent layouts, and aggressive crops may benefit from a high-resolution master.
It also supports efficient variant creation. A designer can reposition the focal point, isolate a product, or produce several aspect ratios while retaining enough detail for final export.
However, 8K does not fix a weak concept, inaccurate product representation, poor lighting, or an unconvincing composition. It does not guarantee that details inferred from a low-resolution source are authentic. It can also create storage, transfer, and page-performance costs if used as a delivery standard without a real need.
The practical goal is crisp, credible creative at the size the audience actually sees. Resolution should serve that goal rather than become the campaign claim.
Step 6: Recompose the Master for Each Channel
Once the source is clean and approved, create destination-specific variants. Do not depend on automatic platform cropping to preserve the subject and message.
Website and Landing Pages
Prepare responsive crops with enough background around the focal point. Keep product details clear while allowing space for headings and calls to action. Optimize delivery dimensions and file size so the visual does not delay the page.
Ecommerce Listings
Prioritize factual accuracy, consistent margins, natural color, and clean product edges. If customers can zoom, inspect the enhanced image closely for invented text or altered physical details.
Social Feeds and Vertical Video
Reframe for the intended aspect ratio. Ensure the subject and offer remain visible inside interface-safe areas. In video, make the opening frames understandable without sound and keep captions readable on a small display.
Email and Presentations
Use appropriately compressed versions rather than the full master. Check legibility on both mobile and desktop. For presentations, test the asset on the actual display if possible because softness and artifacts become more visible at scale.
Large Screens and Event Displays
Confirm the physical dimensions, playback system, viewing distance, and required resolution. A close-up inspection standard may be unnecessary when the audience views the screen from across a room, but compression artifacts and unstable video repairs can still be distracting.
Step 7: Add Current Branding Last
Keep cleanup, enhancement, and branding as separate stages. Apply the latest logo, typography, captions, promotional copy, legal disclosures, and call to action only after the visual master has passed quality control.
This creates two useful assets:
- A clean, unbranded master that can support future campaigns
- A finished campaign version designed for a specific placement
If branding is added too early, every future reuse may require another removal step. Separating the master from the campaign treatment extends the useful life of the source and reduces duplicated work.
Step 8: Apply Human Quality Control
AI reduces editing effort, but it can also produce persuasive errors. A reliable workflow includes a named reviewer and clear rejection criteria.
Check Visual Accuracy
- Does the product still match the real item?
- Are faces, hands, hair, and clothing natural?
- Are logos and small text unchanged?
- Do repaired areas match the surrounding light and texture?
- Are straight edges and repeating patterns consistent?
Check Video Stability
- Does the repaired area remain stable across the full clip?
- Do objects reappear, smear, or distort during movement?
- Are cuts and transitions clean?
- Does sharpening create flicker around edges?
Check Delivery Quality
- Is the composition correct for the destination?
- Is essential content inside the safe viewing area?
- Does the file load and play smoothly?
- Is the image sharp at its displayed size?
- Has the platform introduced new compression artifacts?
Someone who did not perform the edit should complete the final review. Editors can become accustomed to artifacts after repeatedly viewing the same asset.
Measuring the ROI of Repurposed Content
Production efficiency should be measured rather than assumed. Track the workflow before and after introducing AI-assisted repair.
Operational Metrics
- Average time from asset selection to approval
- Manual editing hours per approved output
- Percentage of candidate assets successfully repurposed
- Percentage requiring specialist intervention
- Number of usable variants produced per master
- Avoided reshoots or replacement purchases
- Storage and processing costs
Campaign Metrics
- Click-through rate
- Video completion or watch time
- Landing-page engagement
- Conversion rate
- Cost per acquisition
- Revenue or leads attributed to the creative
- Performance compared with the original asset
Use controlled tests where possible. Keep the audience, offer, copy, placement, and call to action consistent while comparing original and enhanced creative. This makes it easier to determine whether the visual upgrade contributed to the result.
ROI should also account for asset lifespan. A clean master that supports several future campaigns may continue producing value after the first test ends.
Common Repurposing Mistakes
Starting With a Published Download
Social and messaging platforms often compress media. Search for the original export before enhancing a downloaded copy.
Enlarging Before Removing Distractions
Upscaling can make watermarks and artifacts larger and harder to repair. Clean first, then create the high-resolution master.
Making Every Output 8K
Large delivery files can slow websites and complicate asset management. Use high resolution for the master and export according to each placement.
Confusing Plausibility With Accuracy
AI may generate a convincing detail that was not present in the real subject. Review product-critical and factual areas against the original.
Reusing One Crop Everywhere
Each channel needs deliberate composition. A crop that works on a website may hide the offer or subject in a vertical feed.
Ignoring Rights and Provenance
Keep ownership and license information connected to every derivative. Technical cleanup never replaces permission.
Processing Without a Business Use
Do not enhance an entire archive simply because the tools are available. Prioritize assets tied to upcoming campaigns, valuable evergreen content, or clearly defined channel needs.
A Lean Repurposing Checklist
Before beginning:
- Confirm ownership and modification rights.
- Locate the highest-quality source.
- Define the destination, crop, and required resolution.
- Estimate the value of repair versus replacement.
During processing:
- Preserve the original.
- Remove authorized distractions before enlargement.
- Clean noise and compression conservatively.
- Upscale to a defined master size.
- Review high-risk details after every major stage.
Before publication:
- Create channel-specific variants.
- Add current branding and required disclosures.
- Inspect the actual uploaded result.
- Record the source, treatment, reviewer, and approval.
- Measure both production savings and campaign performance.
Turn the Archive Into a Growth Asset
Repurposing is not about forcing every old file into a new campaign. It is about recognizing when a useful idea, subject, or moment is trapped inside an asset with solvable technical limitations.
AI-assisted watermark removal can help create clean versions of authorized footage. Super-resolution can give standard-size photos enough working space for new crops and high-resolution formats. Together with deliberate reframing, compression, and human review, these tools can extend the life of visual content and reduce avoidable production work.
The strongest workflow remains selective. Start with assets connected to real publishing needs, preserve the original, apply only the treatments required, and verify every detail that affects accuracy or trust.
When teams follow that discipline, an archive stops being a collection of finished campaigns. It becomes a library of source material that can be cleaned, adapted, measured, and turned into new marketing value.
