


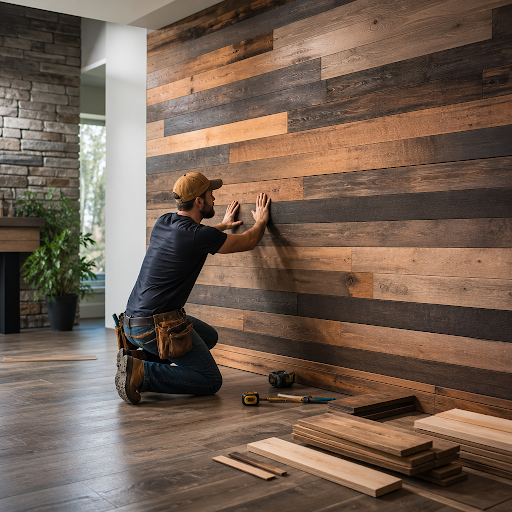
Wood accent walls have become one of the most sought-after interior design features in modern homes. Whether you’re drawn to the warmth of reclaimed barn wood, the clean lines of shiplap, or the geometric appeal of herringbone paneling, a wood accent wall can completely redefine the character of a room. Unlike paint or wallpaper, wood brings texture, depth, and a tactile quality that few other materials can replicate. But achieving a result that looks intentional and professional requires more than picking up a few planks at the hardware store — it demands thoughtful planning, the right materials, and a solid understanding of the installation process.
Why Wood Accent Walls Continue to Dominate Interior Design
The enduring popularity of wood accent walls isn’t a passing trend. It’s rooted in the timeless appeal of natural materials and the way wood interacts with light, shadow, and surrounding décor. A well-executed wood wall can serve as a focal point in a bedroom, a dramatic backdrop in a living room, or a sophisticated statement in a home office. The versatility of wood as a material means it can be styled to suit virtually any aesthetic — from rustic farmhouse to sleek Scandinavian minimalism.
Beyond aesthetics, wood accent walls offer practical benefits. They can add a layer of insulation, help dampen sound, and even increase the perceived value of a home. When installed correctly, they’re durable, low-maintenance, and age beautifully over time. Understanding the different species and cuts available is essential before committing to a design. Resources that explore the many types of wood used in interior applications can help homeowners make informed decisions about grain patterns, hardness, and finish compatibility.
Choosing the Right Wood for Your Accent Wall
Solid Wood vs. Engineered Options
One of the first decisions you’ll face is whether to use solid wood planks or engineered wood products. Solid wood offers authenticity and the ability to be sanded and refinished multiple times, but it’s more susceptible to expansion and contraction with changes in humidity. Engineered wood, on the other hand, is dimensionally stable and often more affordable, making it a practical choice for rooms with fluctuating moisture levels, such as basements or bathrooms.
Popular Species for Accent Walls
Pine is a classic choice for its affordability and ease of workability. Cedar brings a natural aromatic quality and resists moisture well. Oak offers a rich grain that stains beautifully, while walnut delivers a deep, luxurious tone that works especially well in contemporary interiors. Reclaimed wood — sourced from old barns, factories, or warehouses — adds a layer of history and character that new lumber simply cannot replicate. Each species carries its own personality, and the right choice depends on the mood you want to create and the existing elements in your space.
Planning Your Layout and Design Pattern
Before a single plank is cut, the design layout must be carefully considered. Horizontal installations tend to make a room feel wider, while vertical arrangements draw the eye upward and can make ceilings appear taller. Diagonal and herringbone patterns introduce movement and visual complexity, though they require more precise cuts and a higher degree of skill to execute cleanly.
Wall preparation is equally critical. The surface must be clean, dry, and as flat as possible. Any significant imperfections in the drywall should be addressed before installation begins, as they can cause planks to bow or create uneven gaps. Locating and marking studs is essential if you plan to nail or screw the planks directly into the wall structure rather than using adhesive alone.
The Installation Process: What You Need to Know
Tools, Fasteners, and Adhesives
A successful installation depends as much on having the right tools as it does on skill. A miter saw for precise angle cuts, a nail gun or finish nailer for secure fastening, a level for keeping rows straight, and a tape measure for consistent spacing are all non-negotiable. Construction adhesive can be used in combination with nails to ensure planks stay firmly in place, particularly on walls where stud spacing is irregular.
Spacing between planks is a design choice as much as a technical one. Tight, flush installations create a seamless, paneled look, while intentional gaps can add a more casual, rustic feel. If gaps are part of your design, painting the wall behind them in a contrasting or complementary color before installation can add a striking visual layer.
Finishing and Sealing for Longevity
Once the planks are installed, finishing is what separates a good result from a great one. Sanding any rough edges, filling nail holes with wood filler, and applying a stain or clear coat will protect the wood and enhance its natural beauty. The type of finish you choose — matte, satin, or gloss — will significantly affect the final appearance and how the wall interacts with light in the room. Just as proper sealing is essential for wood floors, it’s equally important for wall installations to ensure the wood remains protected against humidity and everyday wear.
Maintaining Your Wood Accent Wall Over Time
Wood walls are relatively low-maintenance, but they do require periodic attention. Dusting regularly with a soft cloth or microfiber duster prevents buildup in the grain. Avoid harsh chemical cleaners, which can strip finishes and damage the wood surface. If the wall is in a high-traffic area or exposed to direct sunlight, reapplying a protective topcoat every few years will keep it looking fresh. For homeowners who also have wood flooring, understanding proper care routines is equally important — deep cleaning and sealing wood floors follows many of the same principles as caring for wood wall installations, making it a natural extension of a whole-home wood maintenance routine.
Tarriver: A Trusted Resource for Wood Wall Projects
For homeowners ready to take on a wood accent wall project, having access to expert guidance can make all the difference between a frustrating experience and a rewarding one. Tarriver has established itself as a reliable source of practical, detailed information for wood enthusiasts and DIYers alike. Their comprehensive wood accent wall installation guide walks readers through every stage of the process — from selecting the right species and preparing the wall surface to cutting, fastening, and finishing the planks with professional-level results. Whether you’re a first-time installer or an experienced woodworker looking to refine your technique, this resource provides the clarity and confidence needed to get the job done right.
Final Thoughts: Investing in Wood for the Long Term
A wood accent wall is more than a design statement — it’s an investment in the character and comfort of your home. When approached with the right knowledge, quality materials, and careful execution, the result is a feature that will be admired for years to come. Take the time to plan thoroughly, choose wood that aligns with your vision, and follow a proven installation process. The effort you put in at every stage will be reflected in the finished wall, and in the way it transforms the entire feel of the room around it.
